Chapter 1: The Importance of Lens Caps
Chapter 2: How Often Should You Clean Your Lens
Chapter 3: How to Not Clean Your Lens
Chapter 4: How to Remove Dust
Chapter 5: Remove Oil and Finger Prints
Chapter 6: How to Clean the Lens with Tissues
Chapter 7: What About Cleaning Solutions?
Chapter 8: Conclusion
Having a clean lens ensures that your pictures will be free of those little dirt specks and other strong artifacts like strange glow and flaring that will alter the quality of your pictures in a negative way.
In this complete guide, I want to show you ways how to clean digital camera lens without damaging the glass and more importantly the precious coating.
Firstly, I will show you ways in which you can avoid your lens collecting dust and spot in the first place and then how to clean your lens properly to make sure, your lens keeps its quality and value for a very long time.
Chapter 1: Importance of lens caps and UV Filters

There are a couple of things that you should do or avoid to make sure your lens
keeps up its quality for a long time.
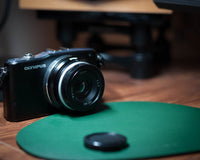
Firstly, you should try to not lose your lens caps. Everyone has lost a lens cap at some point in his or her career and those little things can get lost pretty easily. I always recommend putting the lens cap into your pocket immediately after you switch lenses.
This way you avoid the risk of putting the cap on a counter quickly and forgetting about it the next second. At the end of your shoot, or after switching to another lens, you have your lens caps at hand.
More importantly than the front lens cap is the lens cap on your lens mount. Make sure that you always have the mounting cap on when the lens is not in use to avoid getting dust specks from the lens onto your sensor.
If you lose your lens cap, order a spare one as fast as possible. Lens caps are cheap and you can buy No-name ones in the right size in bulk to make sure you have enough at home. Avoiding that your lens collects dust and spot when not in use is the first step to keep your lens clean.
Especially over time, since dust specks, that don't get removed promptly, can crawl into the lens barrel and stay there indefinitely.

UV Filters. Another item almost any photographer and filmmaker knows of is a UV filter. Its purpose is to filter ultraviolet light pollution before entering the lens. But most people use those filters first and foremost, to protect the front lens element from scratches and also from collecting dust.
Be aware that cheap filters can shift the colors of your overall image, even if it's just slightly. But UV filters are not very expensive in general and can be a quick and easy solution for protecting the lens.
Even if you use these filters, make sure you also clean them from time to time and in a proper fashion like you would with a lens.
Chapter 2: How Often Should You Clean Your Camera Lens?

There is no simple answer to this question because it depends on how often you use a certain lens and how you store it. I store lenses I hardly use in an airtight box and even if I grab them once a year, the glass is pure and clean.
But the go-to lenses I use daily get dirty quickly, especially when I use them outside. In this case, I clean the dirty camera lens whenever I prepare for a shoot. Most of the time I just need to remove some dust, but now and then I have to clean fingerprints that get on the lens by accident.
I wouldn't clean the lens for the sake of it, because every time you clean the lens you could damage it by accident.
Even you are very careful, cleaning scratches can occur every time you clean a lens. So the short answer could be: Only if necessary.
Chapter 3: How to Not Clean Your Lens

Before I can talk about the proper way to clean camera lens, we have to establish what you need to avoid at any cost. I know that your jacket can seem like a nice option in the heat of the moment, but be aware that clothing items were never intended to clean high-quality glass with fragile coating.
The rough texture of cloth can scratch the coating on your lens's front element. You always want to protect the coating, since lens manufacturers put these on to reduce lens artifacts like flaring and ghosting.
And many expensive lenses, like high-quality primes and cinema glass, have special coatings for exactly that. If you use your jacket and rub the coating off, you are also rubbing off the very thing you spend your hard-earned money for.
So please only use your jacket to keep you warm and to look nice and not to clean your dslr lens. But I guess if you are in the middle of nature, get a splash of dirt onto your lens and there is no lens cleaning kit around, a very gentle wipe can help you get a shot you would otherwise miss.
But if you got the time beforehand and want to prepare for an upcoming shoot you should avoid t-shirts and other clothing items at all costs.
Chapter 4: How to Remove Dust

Remove Dust. First, we need to remove dust. Dust particles can be visible in your pictures when you point the lens against a bright light source like the sun. They look like bokeh balls, but in a very unpleasing way, and lower your contrast quite a bit.
And if the lens is stopped down the dirt can be visible as little black spots in your pictures. Therefore, we want to get rid of dust as fast as possible.
If you kept liquids and your fingers off the front element of your lens, the only dirt your lens might gather is dust specks that float around in the air.
This is the dirt you can remove quite easily. Some people might just blow onto the lens, but be careful. By the simple act of blowing onto your lens, your spit, even just tiny particles, could hit the lens.
You always want to avoid getting liquids like water involved in cleaning your lens, since liquids can get into the inner workings. This can lead to fungus and haze inside the lens, which makes your glass unusable.

A better way to remove dust from your lens is to use a small camera air blower, or lens cleaning below, which you can get with almost any lens cleaning set.
Grab your lens with one hand and hold it upside down, so the glass element you want to clean faces the floor.
This way gravity can work its magic and then blown off dust will fall onto the floor and won't get inside the lens.
Next, you point the air blower directly to your lens and blow a couple of times. It can take a couple more blows before all the dust is gone but don't remove the dust with a cloth.
By pressing dust specks with your cleaning cloth against the glass you could also scratch the lens and do more damage than good. Removing dust with a cloth is also the reason for most cleaning marks on older lenses. So, use air to remove dust off your lens first before proceeding.

Another tool to remove dust is cleaning brush. Like with the air blower, these small lens brushes come with many cleaning kits included and are made to not harm your lenses coating in any way.
But these brushes are still a physical invasion and therefore should be considered after using air, since air is the most gentle method for removing dust.
I would recommend using a brush when you are in a hassle or have particular stubborn dust particles that won't come off with air pressure.
Chapter 5: Remove Oil and Finger Prints

After you got rid of all dust specs you should check your lens for any oil, fingerprints, and other dirt. The front element can get oily pretty quickly by touching it accidentally, which can happen when you are a manual focus shooter.
Those oily spots can decrease the contrast in your picture quite a bit and increase the amount of flaring. Back in the day photographers did put Vaseline onto their front filters to get a “dreamy glow”.
But a lot of time has passed since then and we want to avoid those "artsy" looking images. Also, oils and other liquids can destroy the coating chemically over time, so this is why we also want to avoid that.
There are several ways to get rid of this impurity. As we already know, we should avoid regular cloth to clean that off but microfiber tissue, that is specifically made for lens cleaning, is a cloth that you can use.
Be aware that not any microfiber tissue can be used, like the ones you might get for free from your optician. Only buy microfiber tissues that are specifically made for lens cleaning.
Also, you shouldn't use the same cloth twice, since it already absorbed the oils and dirt. Using it twice wouldn't work well.
Chapter 6: How to Clean the Lens with Tools

Be sure to not go in full circles, but start in the middle of the lens and rub circular in a spiral to the edge of the lens.
If you go in circles in the same place you could accidentally scrub in a dust particle, you might have overlooked into the glass multiple times.
If you aren't happy with the result you can start again or go over some spots that need a little more treatment. But don't use the same spot of your tissue twice for the aforementioned reasons.
Some people don't think that microfiber is good enough for cleaning lenses, but several lenses manufacturers themselves produce microfiber tissues for their lens cleaning kits, so they should know best.
There are also wet tissues for single-use out there to get your lens clean. These tissues look the same you get for cleaning glasses. Just like microfiber tissues, those wet tissues should be only used once.
You also have to be careful that you don't get any liquid inside the lens when cleaning the edges. You should also not buy the cheapest ones available, since wet tissues, unlike microfiber, do their work on a chemical level, which can result in damages to the coating.
But if you get high-quality ones you can clean the lens in the same fashion as with your microfiber tissue.
No matter which tissue you want to use to clean your lens, make sure you are not too rough.
Don't use too much force while cleaning, because this can result in ugly cleaning marks that will damage the lens permanently.
Another tool to remove liquids from your lens is a lens pen. This tool works with a special combination of materials to give your lens a proper cleaning.
It kind of works in the same way as a tissue, where you work around the spot that needs cleaning in spiraling circles.
Likewise, you should get rid of any dust specks beforehand to prevent them from scratching the lens.
Chapter 7: What About Cleaning Solutions?

I have a friend who often clean their canon camera lens with alcohol. I think that it is not a best way. Well, as I already mentioned, we should always avoid getting liquids involved when we clean lenses. Solutions that are made for eyewear aren't made for camera lenses, simply because they can drip off your glasses without any damage.
But when sprayed onto a lens, the liquid can crawl into the lens barrel and create permanent smudges and, in the worst case, lead to creating fungus.
Also exhaling onto the glass before going over it with proper tissue is even worse. Your warm breath is super tiny water particles that can crawl into almost any crack imaginable.
If you do this practice very often this could also lead to the growth of fungus and
haze inside your lens, and make it useless.
Conclusion
I like the combination of an air blower and microfiber tissue the best for fast turnarounds when I get ready for the next shoot.
Firstly, it gets rid of dust fairly quickly without the danger of damaging the coating, and second, the tissue gets rid of other impurities that a lens collects over time in a simple and fast manner.
I hope this guide was useful to you and gave you a complete overview of how to keep your lens clean, so you, the creator, keep on producing the very best pictures without any interference from dust and fingerprints.
 - Josef Lichtenberger


